Case study
Laser marking on dental implant elements and equipment
20W MOPA Laser
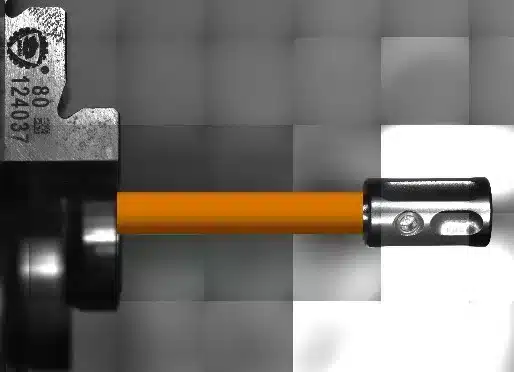
1. Trough the vision system, the area to be marked is determined (in orange)
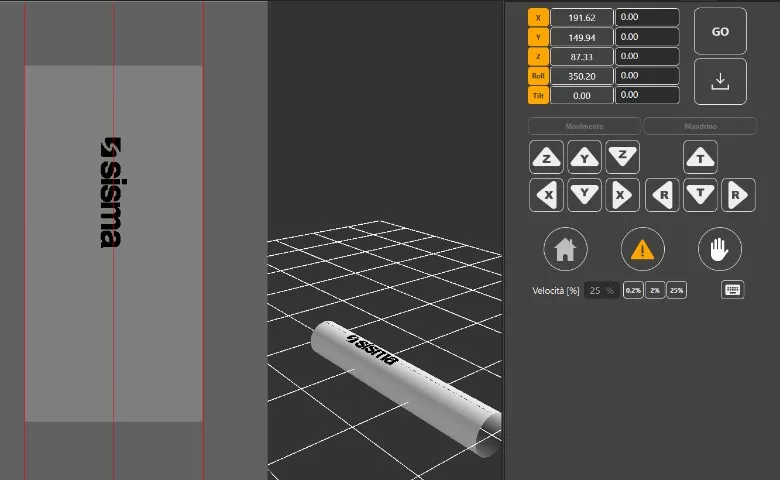
2 – The detected cylinder is unwound flat (grey rectangle on the left) showing the entire available marking area
20W MOPA laser test
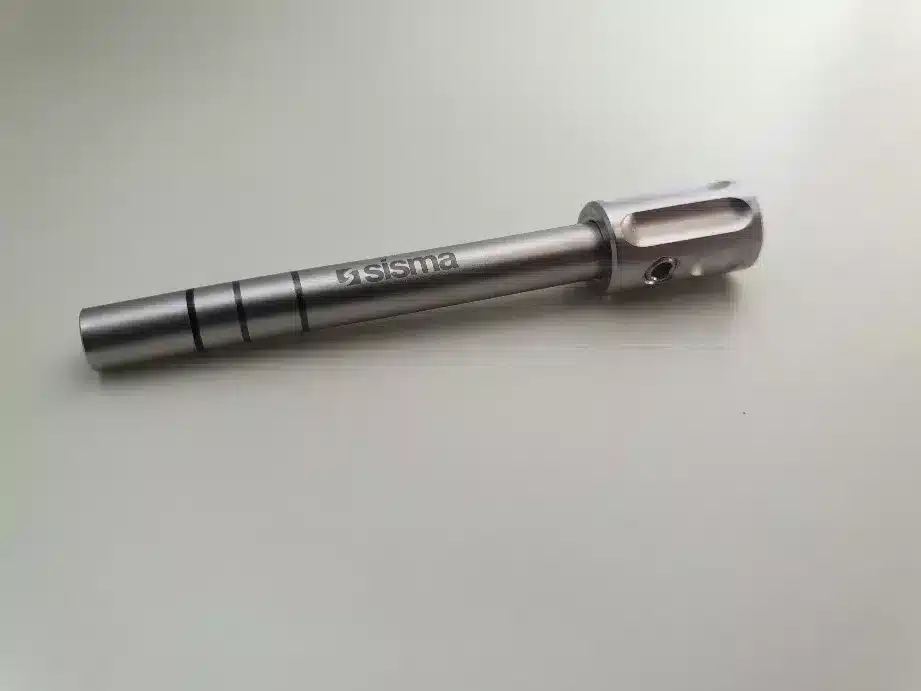
On the torque spanner we operated on two of its component, i.e. on the stem with adjustment ring nut and on the graduated body.
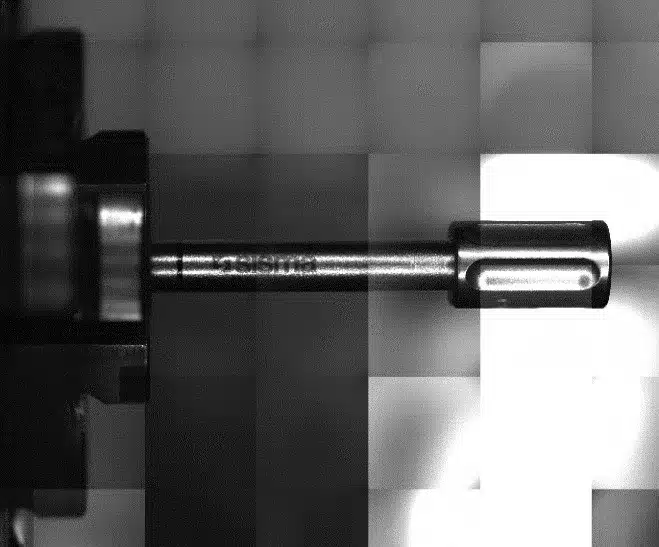
Stem with ring nut. On the steel stem we wrote the Sisma brand name longitudinally and added two bands with continuous markings (one was already there, heavily etched and blackened with paint; it is the first on the left in photo 4).
Continuous marking consists of a mark of the length corresponding to the thickness of the marked band (0.5mm) repeated by the laser along the x-axis, always the same and in the same position; it is then the rotation of the object given by the spindle that creates the band around it. The rotation can cover a full turn of the spindle or even 2, depending on how much you want to blacken; however, we cannot exceed this, so as not to create a groove perceptible to the touch. Thanks to the tilting spindle, we then oriented the stem vertically by marking the head of the ring nut with the words ‘B&B DENTAL Implant Company’ (photo 6).
All these operations are determined and organised in a simple way by the SLC3 software interacting with the Coaxial Vision System (CVS). The sequence of operations is exemplified in the following photos 1,2,3.
The total time for the entire machining cycle (two bands, ‘Sisma’ inscription, vertical spindle tilt, “B&B DENTAL – IMPLANT COMPANY” inscription) is 2 minutes 55 seconds.
The result obtained is largely satisfactory (photos 4 and 6): clearly visible inscriptions (not black, but dark grey) and barely perceptible to the touch; in this case a subsequent passivation treatment might be useful but not necessary.
B&B Dental provided us with lance cutter, torque spanner, abutment and implant in order to develop a marking process.
They are elements that must be resistant to corrosion and ensure long-term durability under stressful conditions such as decontamination and subsequent autoclave sterilisation.
It is important to achieve a marking with well-contrasted characters and marks, but not perceptible to the touch. We must therefore avoid removing too much material by carefully modulating the various parameters (power, laser speed, spindle speed, etc.).
The machine used in the tests is a BSP, equipped with a roto-tilting spindle. Marking tests on the various elements were first performed by equipping the machine with a 20W MOPA laser source; then the same, or similar, tests were repeated with a 50W Pico laser source.
3 – Work performed, detected by the vision system
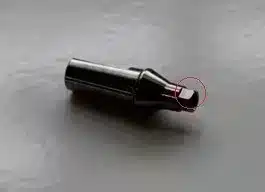
4 – Photographic image of the marked object
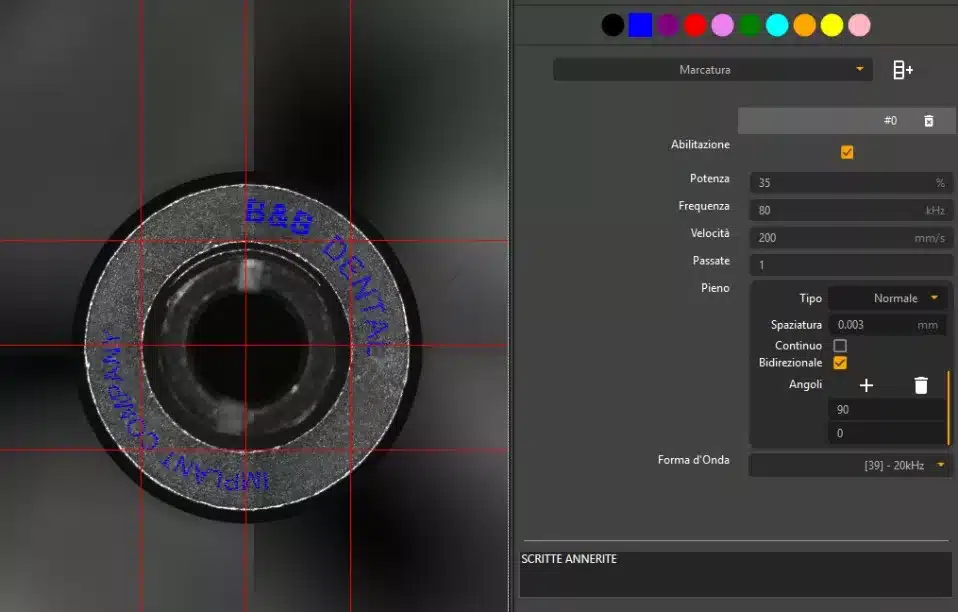
5 – Marking software setup
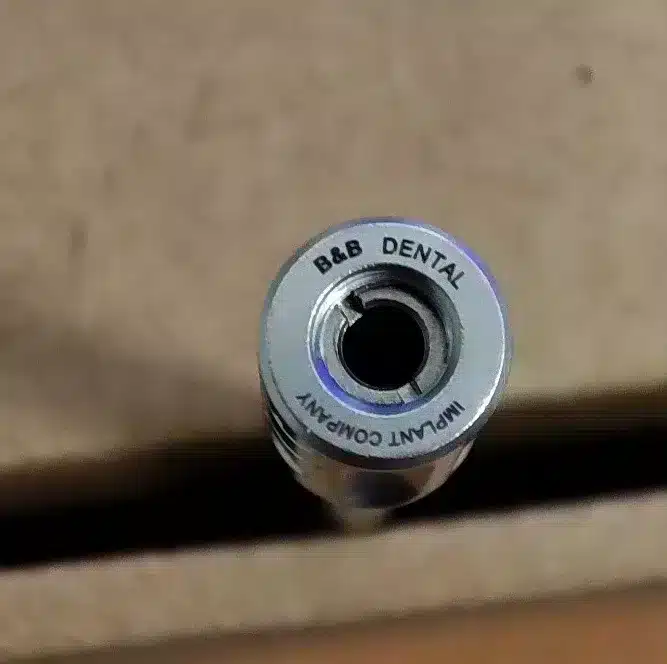
6 – Detail of the result
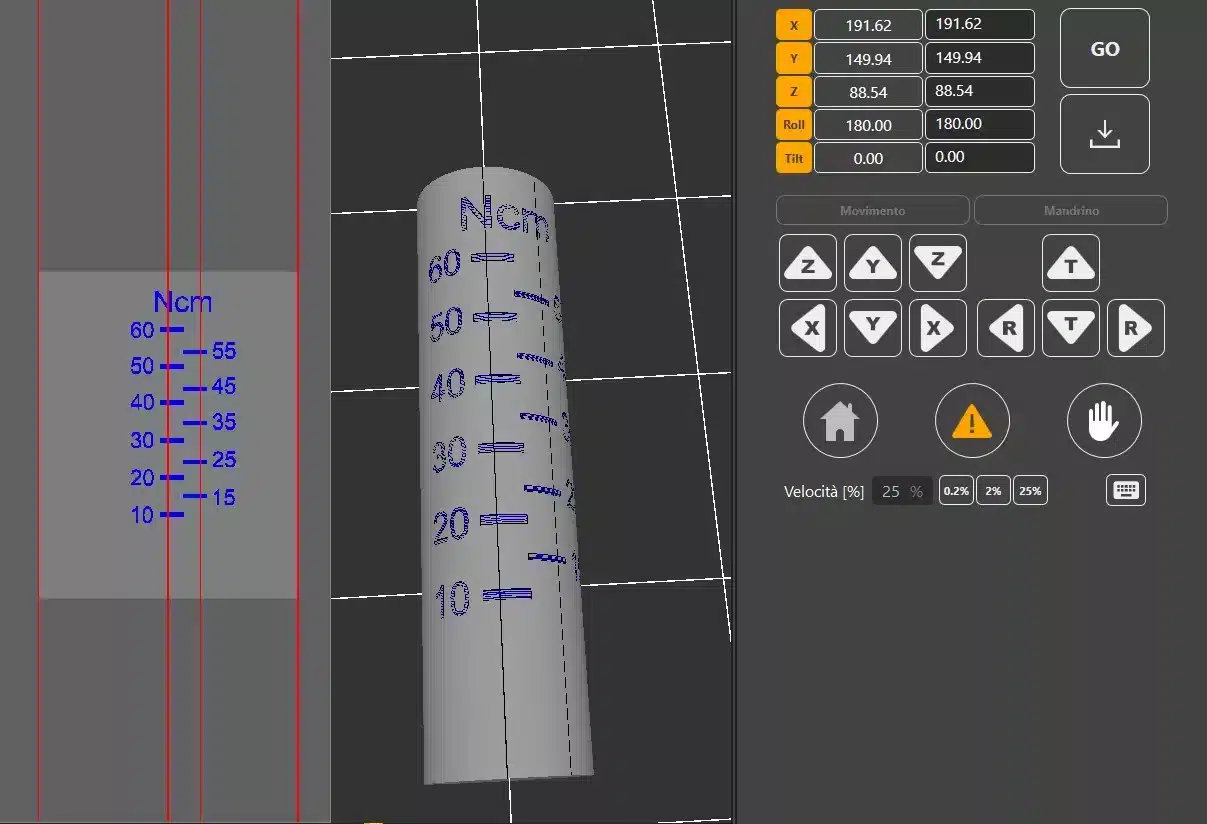
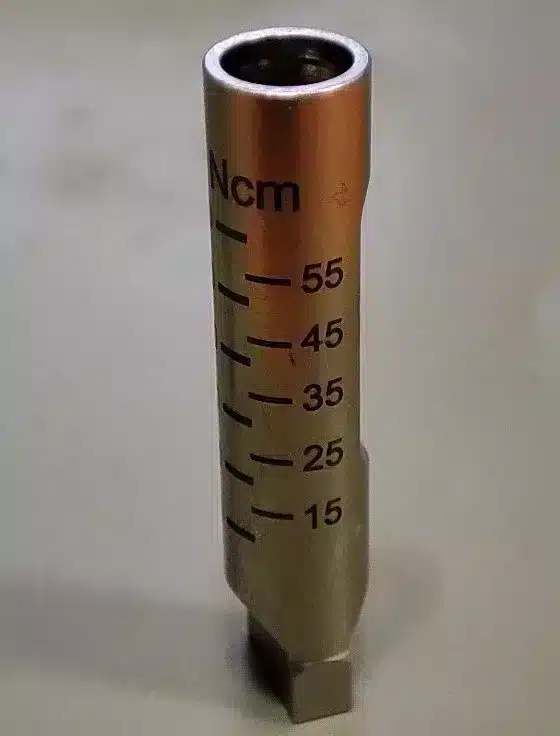
7 – Software setup of the graduated scale
8 – Outer sleeve final marking
9 – Image from the software machine
10 – Final result
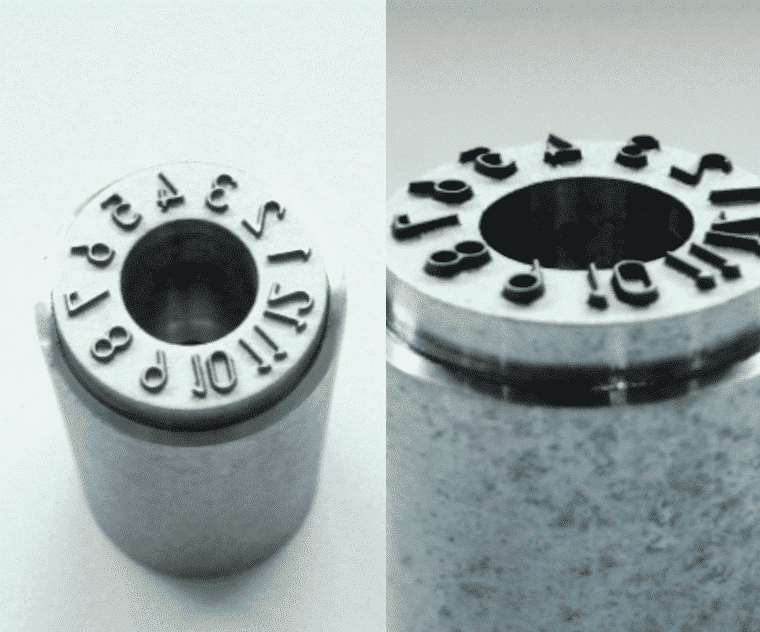
Graduated sleeve. The outer sleeve of the torque spanner already had notches with the relevant tightening numbering. These inscriptions were, however, strongly embedded in the metal surface and made more evident (blackened) by subsequent colouring. We aimed to make the inscriptions themselves intangible, but still clearly visible.
In this case, in order to maintain the intangibility of the marking, it was not possible to achieve a visibility of the signs comparable to that of the existing (engraved and painted black) signs. We therefore had to use slightly more incisive parameters, eventually achieving good visibility of the marked elements (photo 7), but on the other hand, a certain amount of tactile relevance.
The execution time is approximately 40sec.
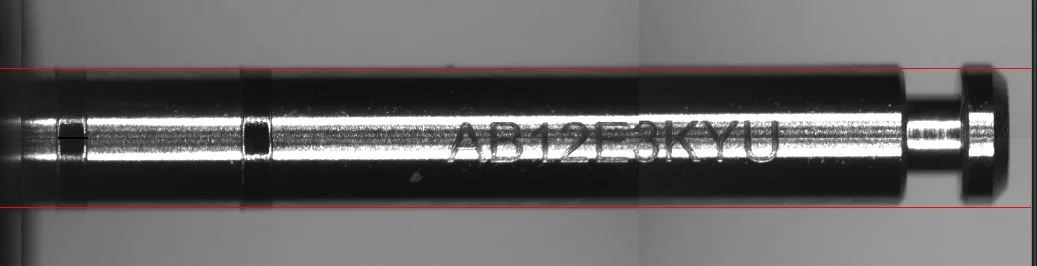
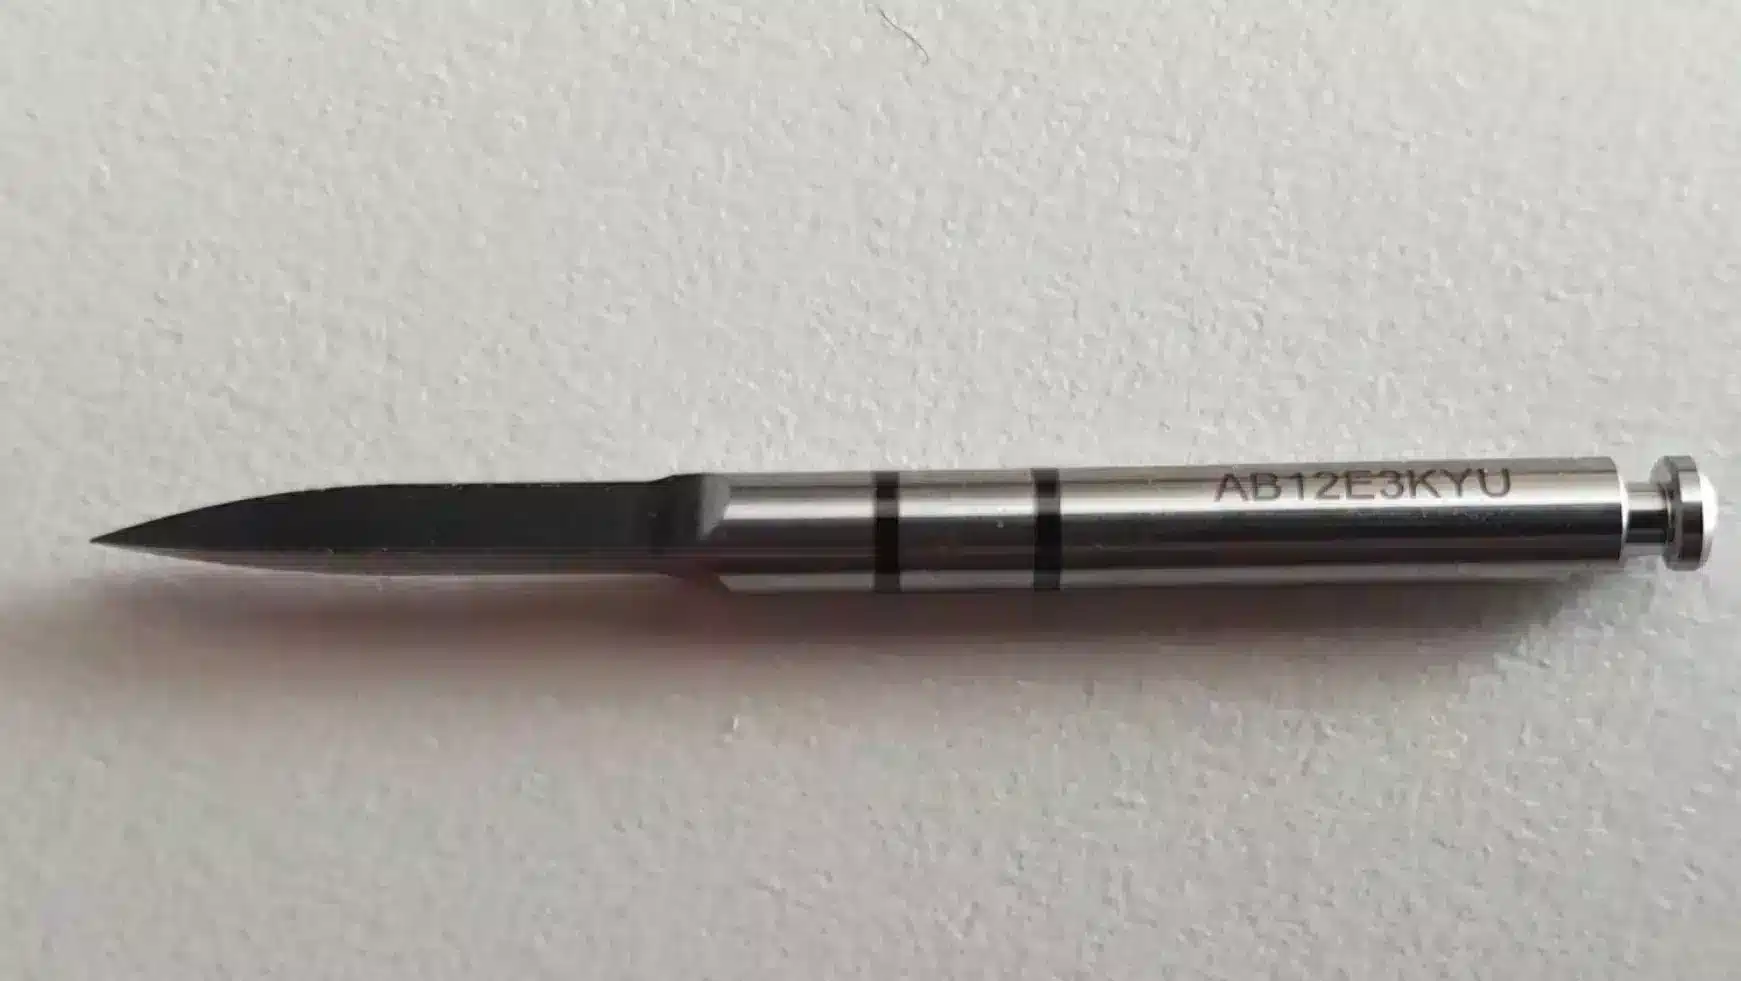
Steel cutter. On the steel cutter, we want to combine a continuous black marking (two bands) with the writing of a code on the cutter shank, using the same procedure as for the ratchet shank.
The next step is the continuous marking of the two strips, followed by the alphanumeric code, with characters 0.6 mm high and clearly legible. In this case, due to the small size of the code, it is written using only the galvanometer (no axis movement).
The whole session was completed in 55 seconds.
Again, as with the ratchet handle, the result is very good in terms of legibility and unobtrusive to the touch.
On the implants and abutments, you want to mark a data matrix indicating their mutual correspondence (a specific implant must correspond to its specific abutment).
Abutment. A 1.16 x 1.16mm datamatrix, 12 x 12 format, can be marked on one side of the hexagon at the end of the abutment.
The datamatrix, generated by the SLC3 software, is positioned on the workpiece by the vision system in the same way as before.
The datamatrix is executed in about 10 seconds and can be read under the microscope with a special reader (Cognex 8600).
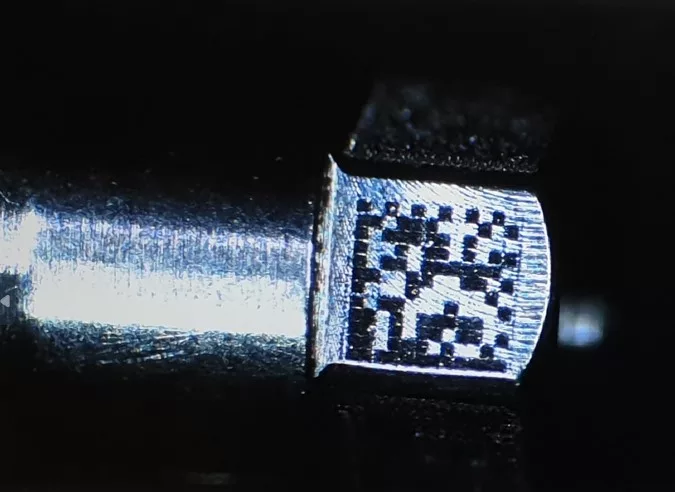
11 – Microscopic view of the marked data matrix
12 – Abutment with datamatrix
B&B Dental S.r.l. is a leading dental implant manufacturer in the field of oral implantology. It specializes in the design, manufacture and selling of dental implants and bone regeneration materials.
The company, based in San Pietro in Casale in the province of Bologna, was founded in 1992 from the surgical experience of Dr. Banzi. A scientific director and founder, he now coordinates a team of experienced dental engineers to develop new products and cutting-edge solutions to meet the growing clinical needs of its customers and their patients.
Curious about all the Sisma applications for marking and engraving? Contact us and we will be happy to answer all your questions.